Introduction
Imagine you are working in a company that keeps records and transcription of phone calls for various reasons, like quality assurance or improvement purposes. Now, let’s say you need to transfer a call to someone outside the company, maybe a client or a partner.
Previously, this transfer process might have involved a few steps, and the recording and transcription could continue even after the call was transferred. Now, things have changed for the better. Transferring a call to an external number is now done in just one click & when the call is transferred, the recording and transcription stop immediately.
Business Use Case
In a business scenario when a sensitive discussion is going on during a call and the call is subsequently transferred to an external agent for some business purposes, then the existing system allows for the continuation of call recording and transcription even after the transfer of the call. In such scenarios, there exists a risk that any private or sensitive information disclosed during the call may be recorded or transcribed, potentially leading to the misuse of organizational information.
This new enhancement plays an important role in safeguarding of organization’s sensitive information. Any private or sensitive information discussed on the call won’t be recorded or transcribed. It ensures a secure call transfer process, addressing both efficiency and confidentiality.
Configuration Settings
Here’s an elaboration on how you can call external agents from a Customer Service Workspace application and perform various activities during the call in a safe manner:
Setup for outbound calling:
Open the Customer Service Admin Center.
Navigate to the Channel entity in Customer Support from the site map.
Scroll down the page then you will find the Phone Number
Click on Manage button as shown in below screenshot.
After clicking on manage button you will be redirected to the below page then Click on Setup
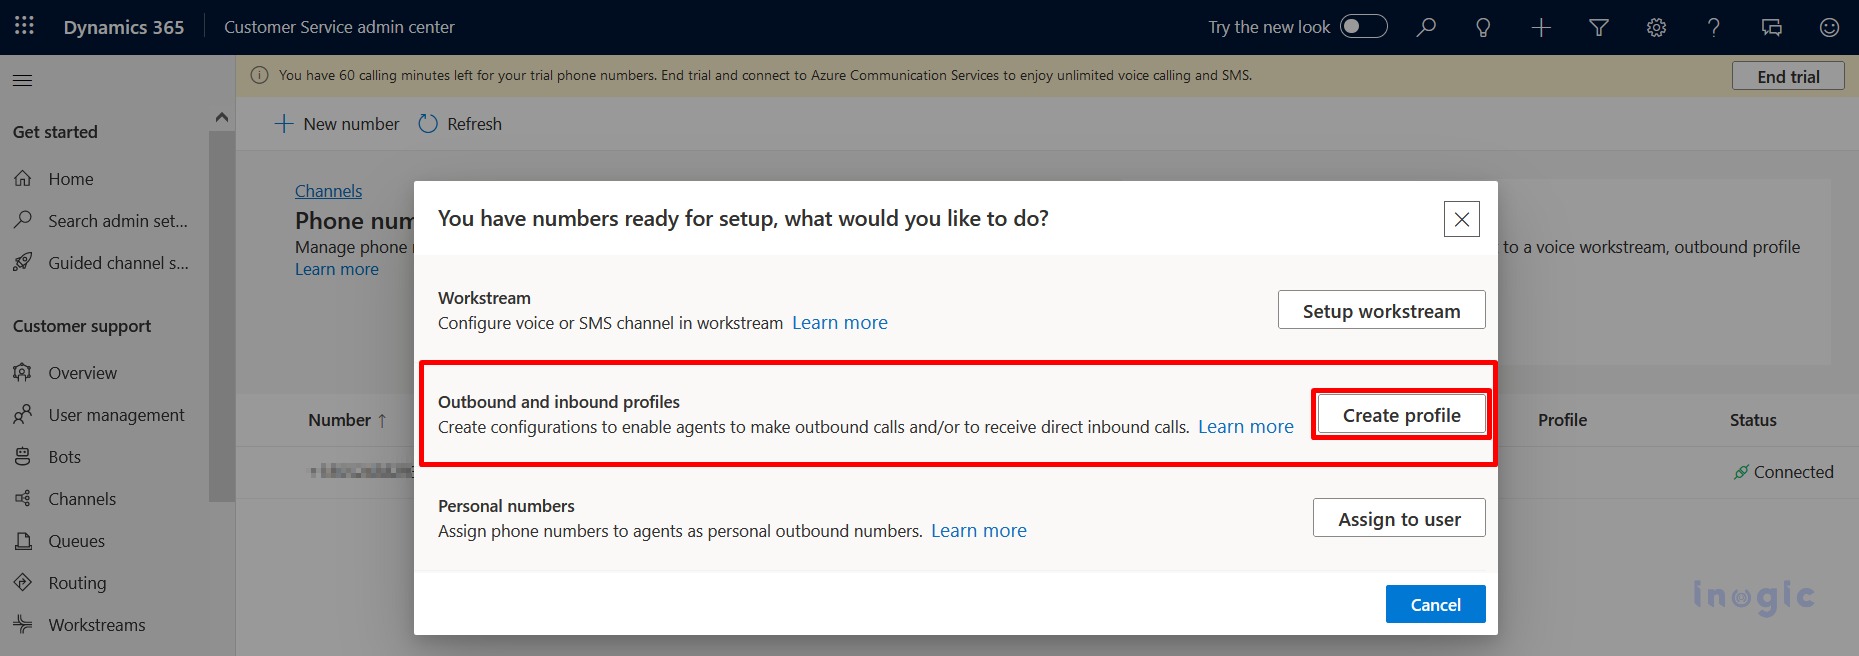
Please Note: There’s a default number that system gives you however, if you want to use any other number for transferring the call, you can do that too with the help of the “+ New Number” option on the left top corner of the ribbon bar.
Upon clicking the Setup button, you will be redirected to the page below. Then, click on the Create Profile button
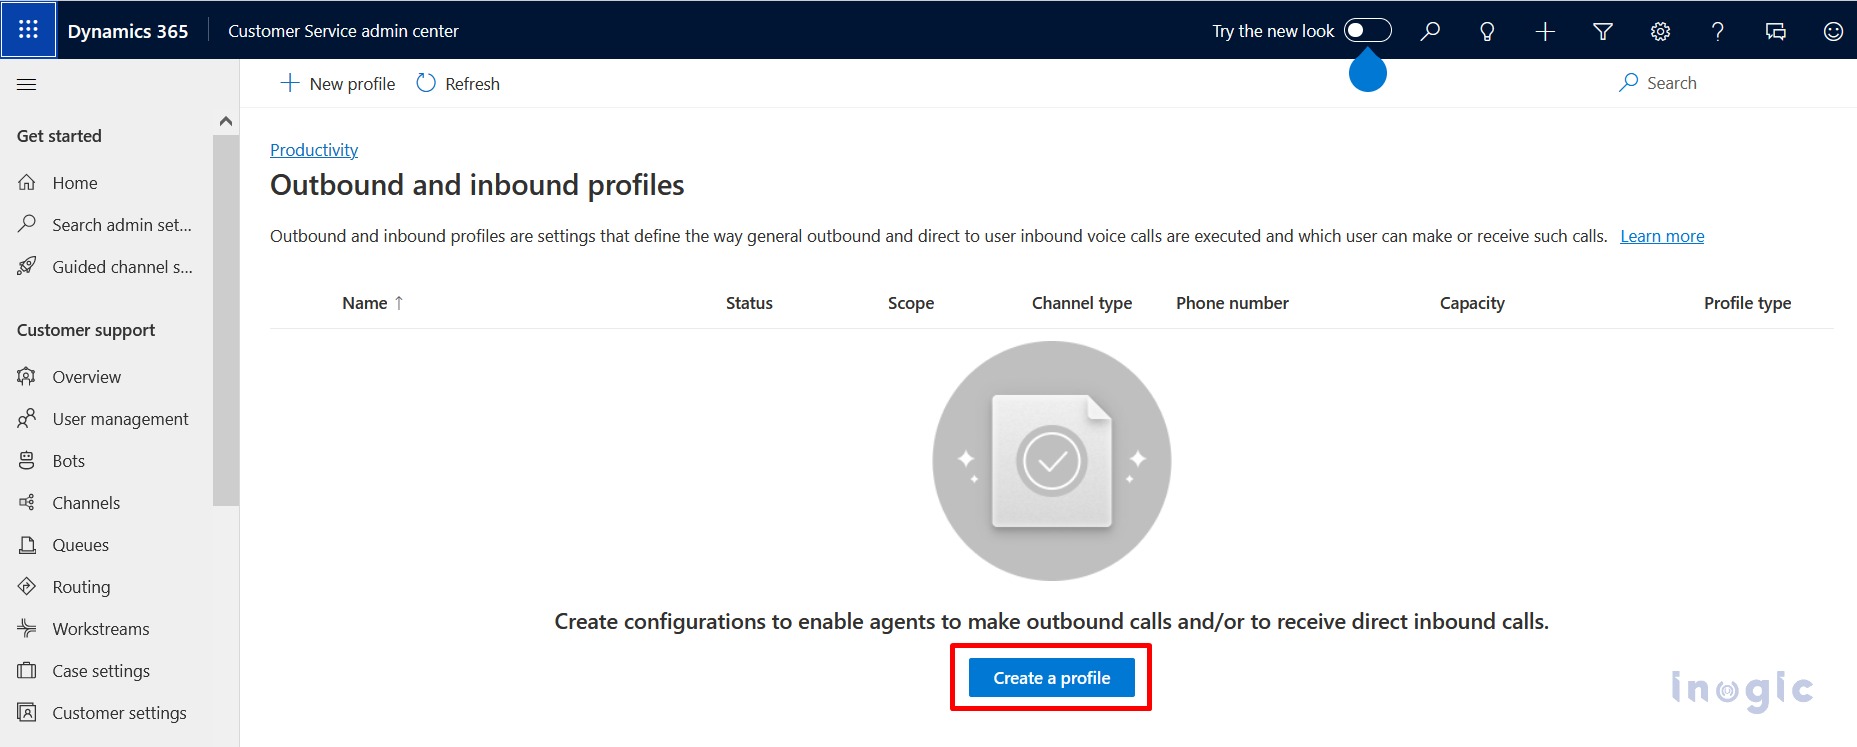
Following that you will be redirected to the Outbound & Inbound Profiles page, then Click on Create Profile
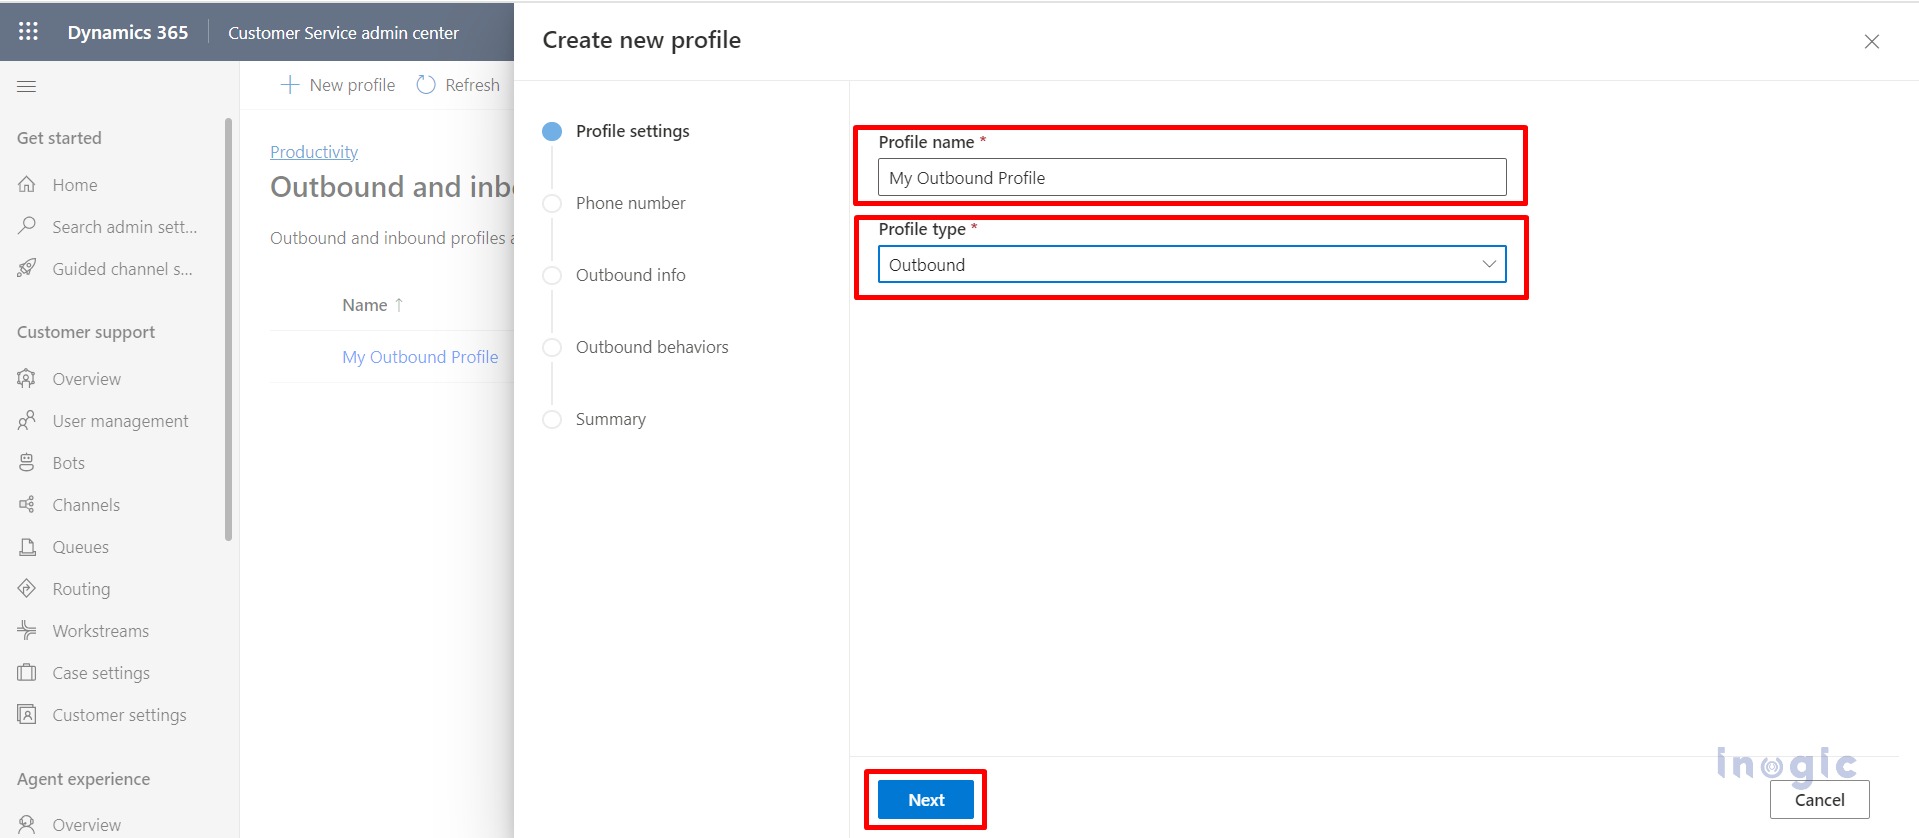
Enter the Profile Name and select the Profile Type as Outbound From dropdown options.
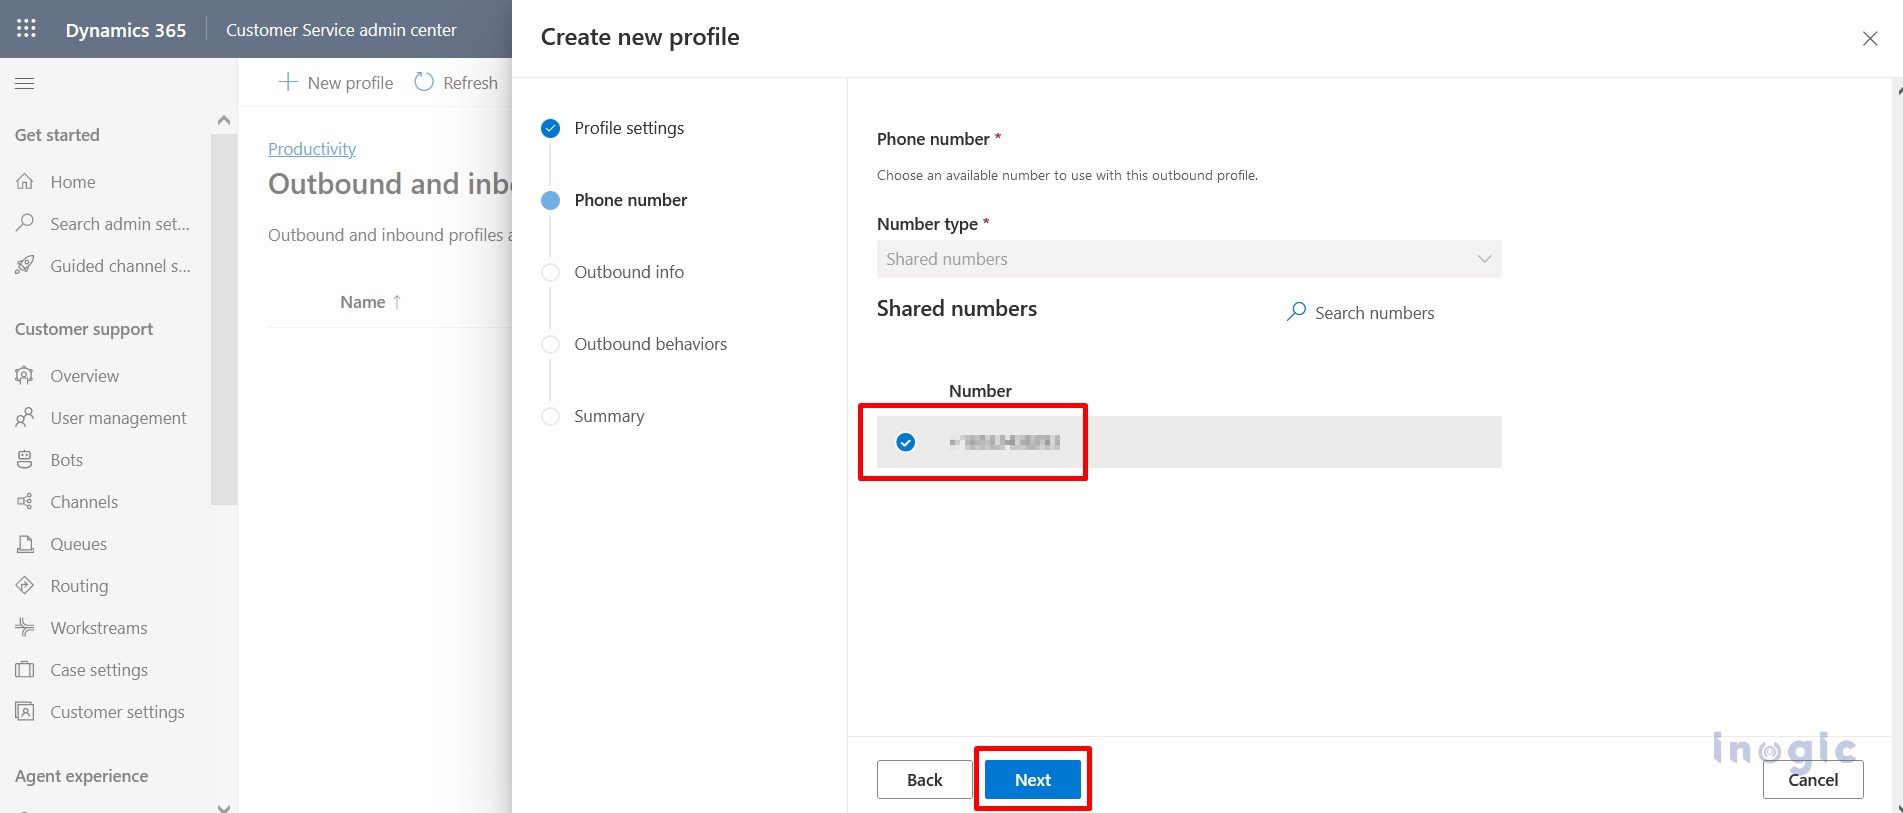
Select Phone Number and click Next.
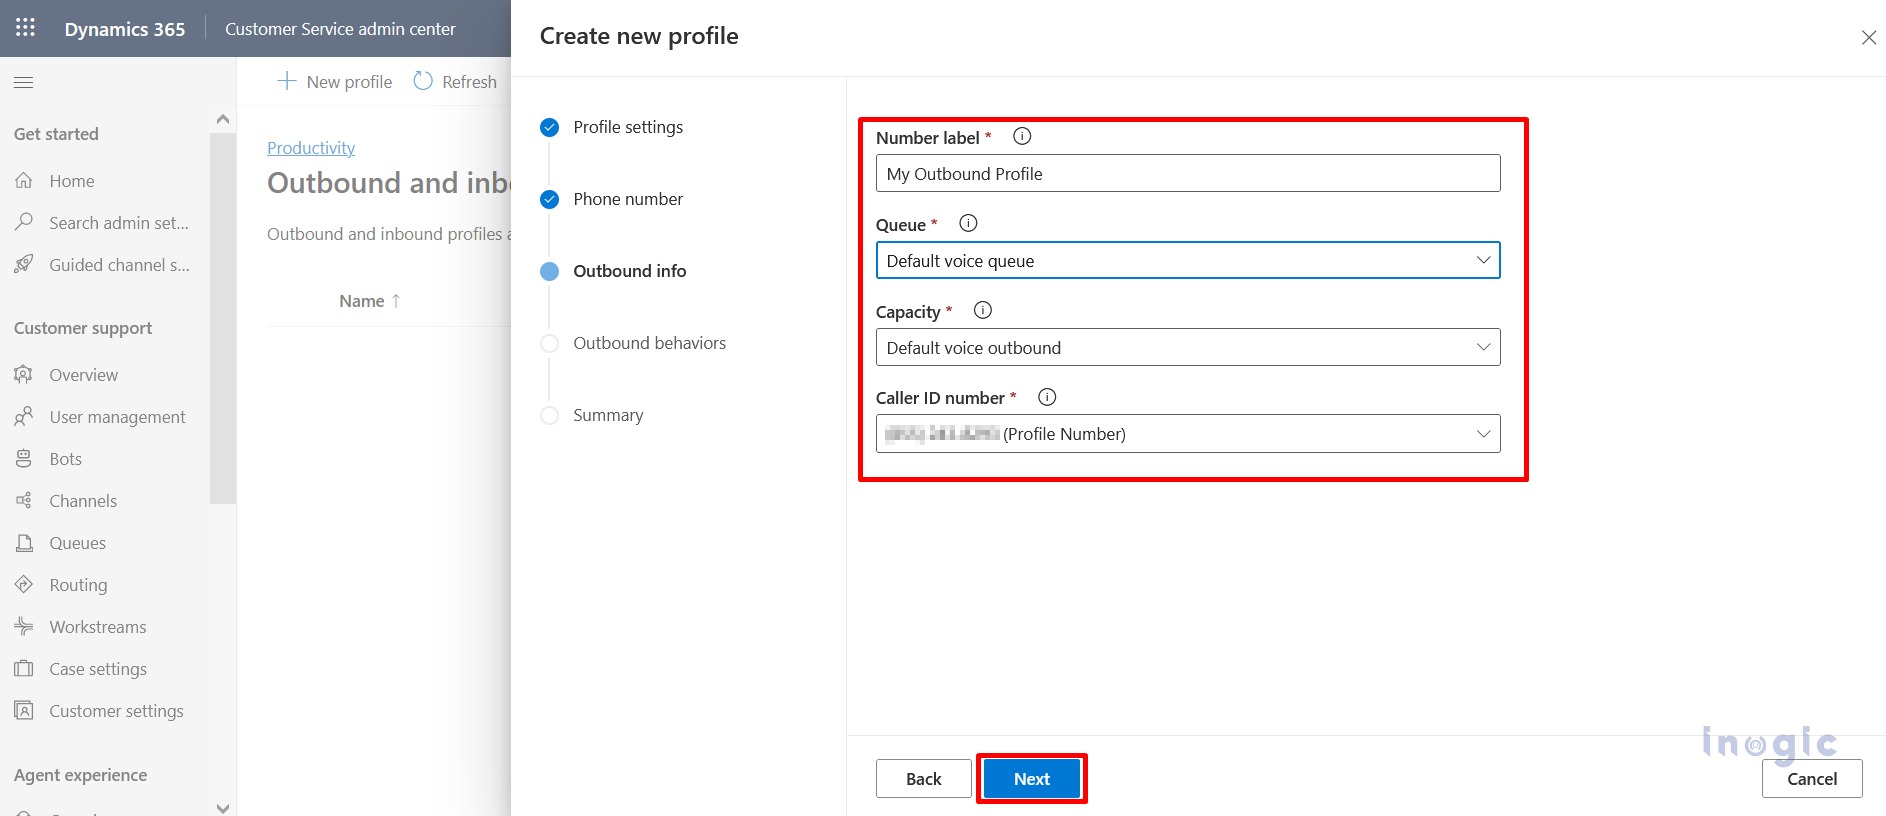
Following that you will be redirected to the below page.
Fill the required details as explained below.
Number Label– Here value will auto-populate as given Profile Name in above steps.
Queue– Select the required queue from dropdown options.
Capacity– Select Default voice outbound from dropdown options.
Called ID Number– Here number will be auto-populated as selected in the above steps.
Click on Next button, then you will be redirected to the Outbound Behaviors page.
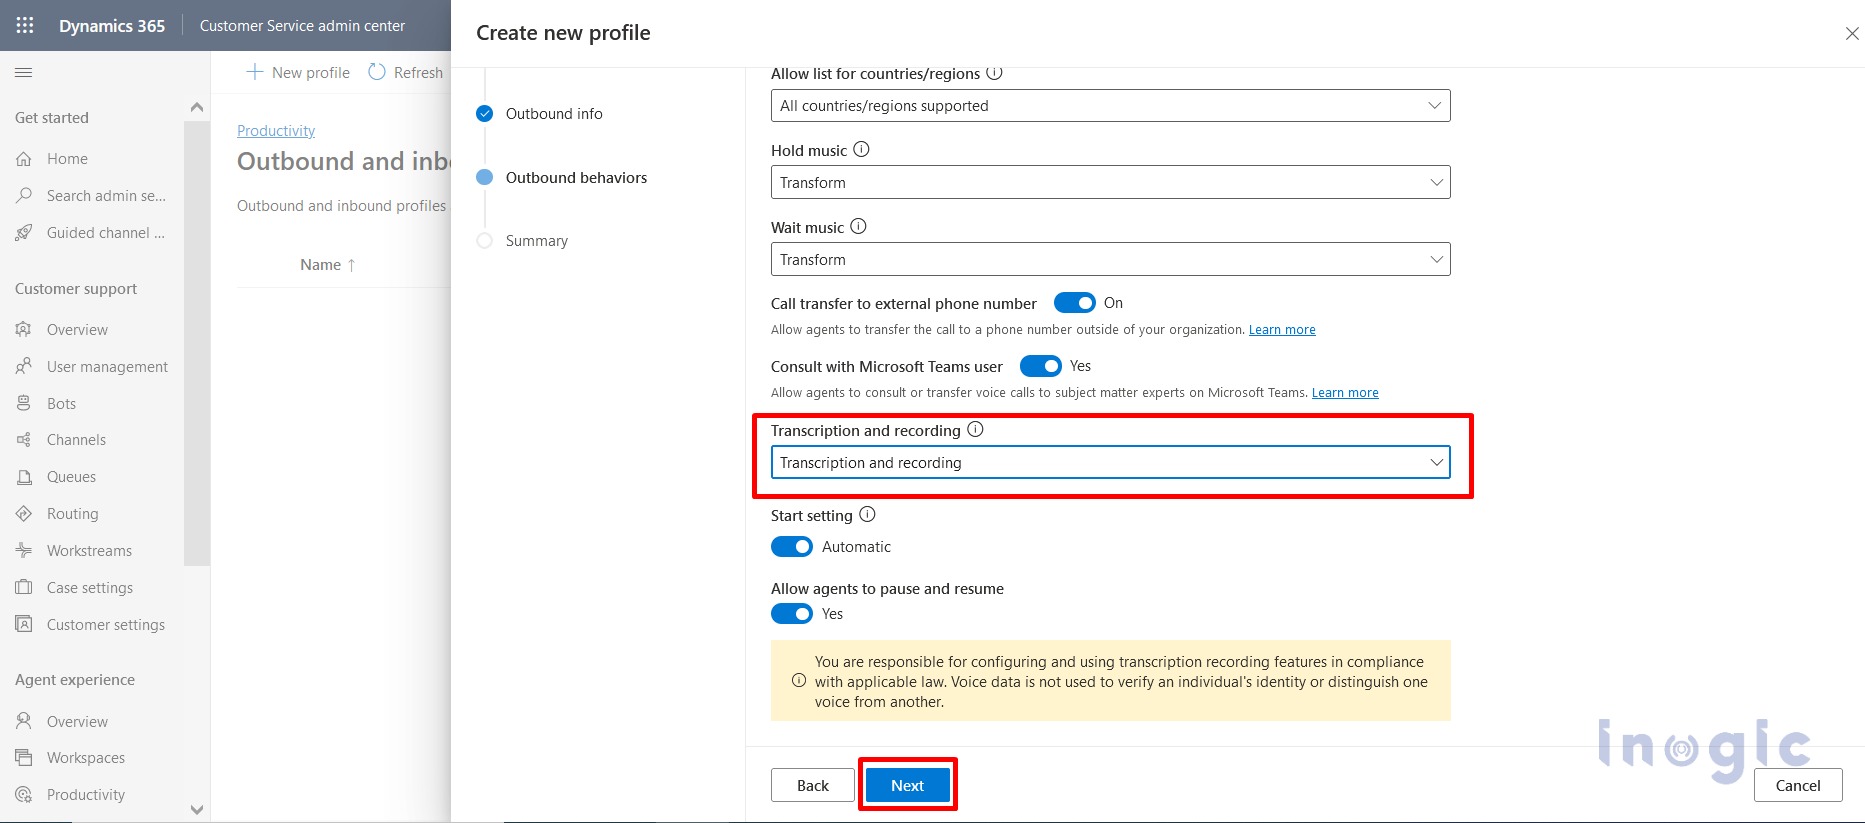
Here fill in the required information as shown below.
In the Transcription and Recordingsection, select the Transcript and Recording dropdown menu, and then select Transcription or Transcription and Recording.
Under Start setting, set the toggle to Automaticif you want calls to be automatically recorded and transcribed when they begin, or Manual if you want agents to record and transcribe their calls.
Set Allow agents to pause and resumeif you want to allow agents to control the portions of conversations that they record and transcribe.
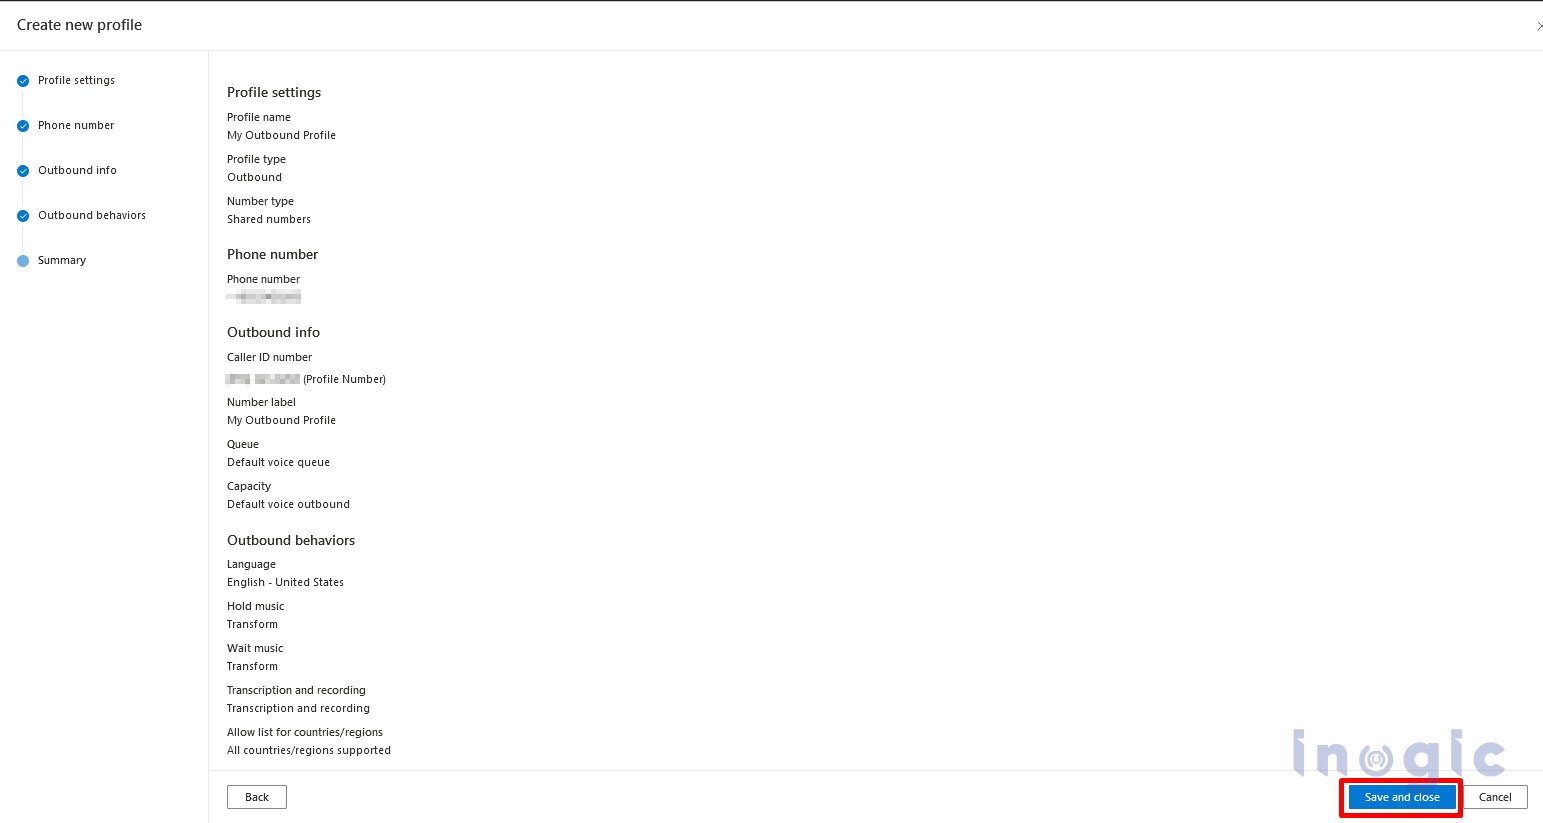
Click on Next and check the details in the summary and click on Save and Close to create the outbound profile record
Finally, Outbound Profile is created as shown below.
Initially profile status is in pending stage.
Then Click on Refresh button after 2-3 minutes the profile status will be in Active stage.
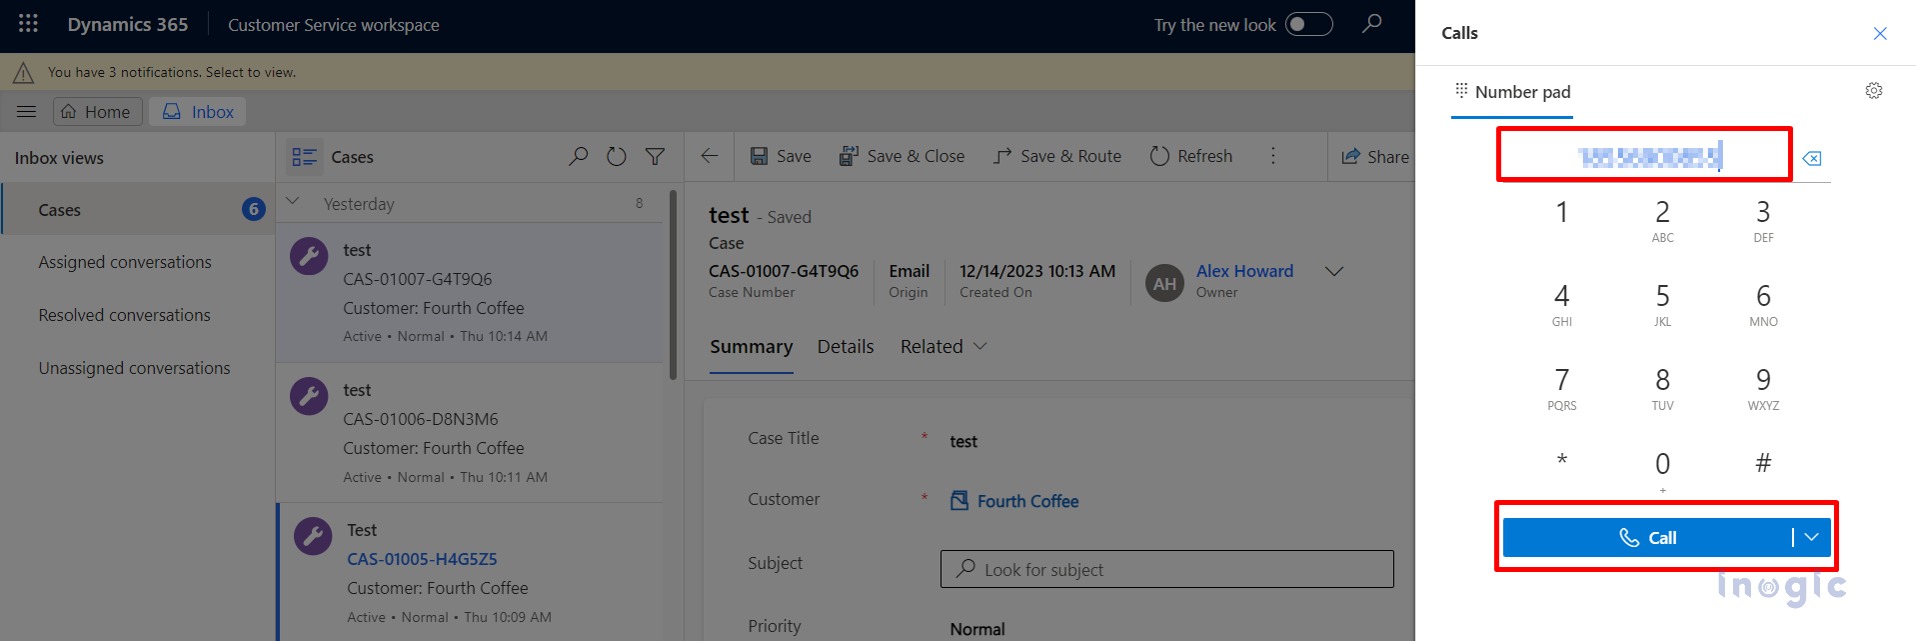
With all settings in place, navigate to Customer Service Workspace. Then Phone Symbol will appear in Customer Service Workspace app as shown in below screenshot.
Click on ‘Phone’ symbol then Dial pad will open. Here enter the phone number and click on ‘Call’ button as shown in below screenshot.
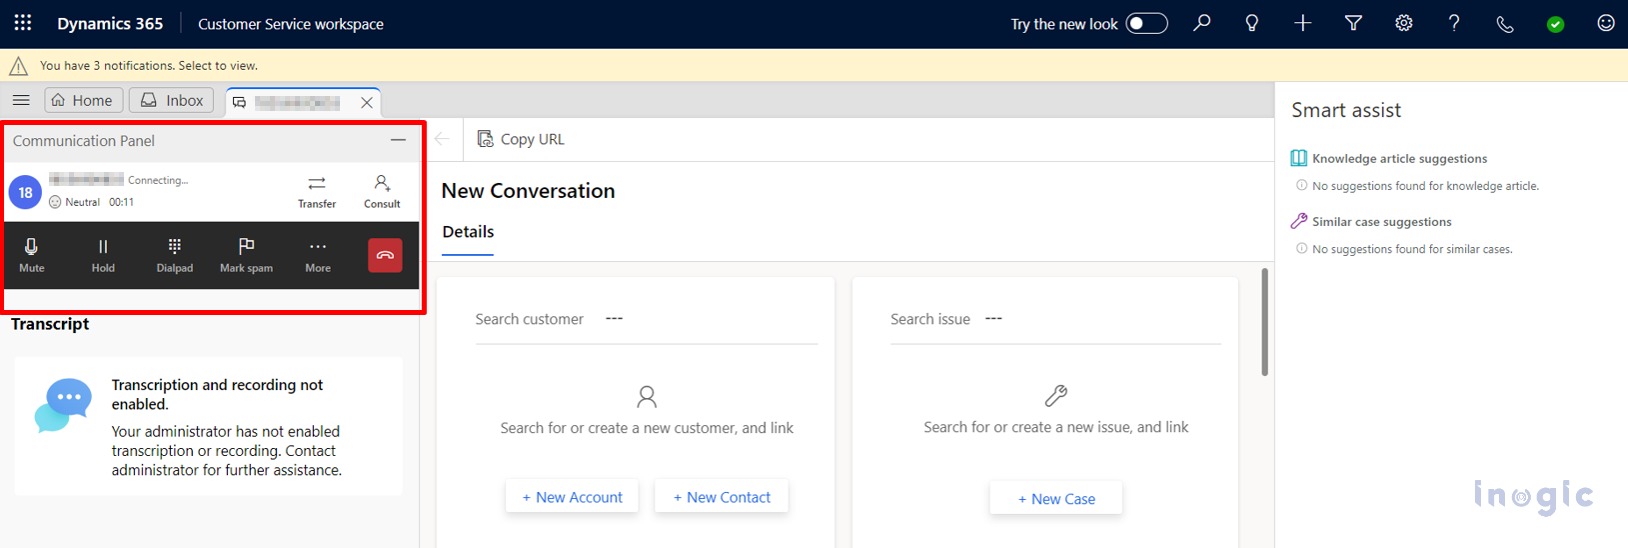
After clicking on Call button, Communication Panel will appear on left side of screen.
Features
From communication panel, we can perform different actions during a call as below.
Mute
Hold
Dialpad
Mark as spam
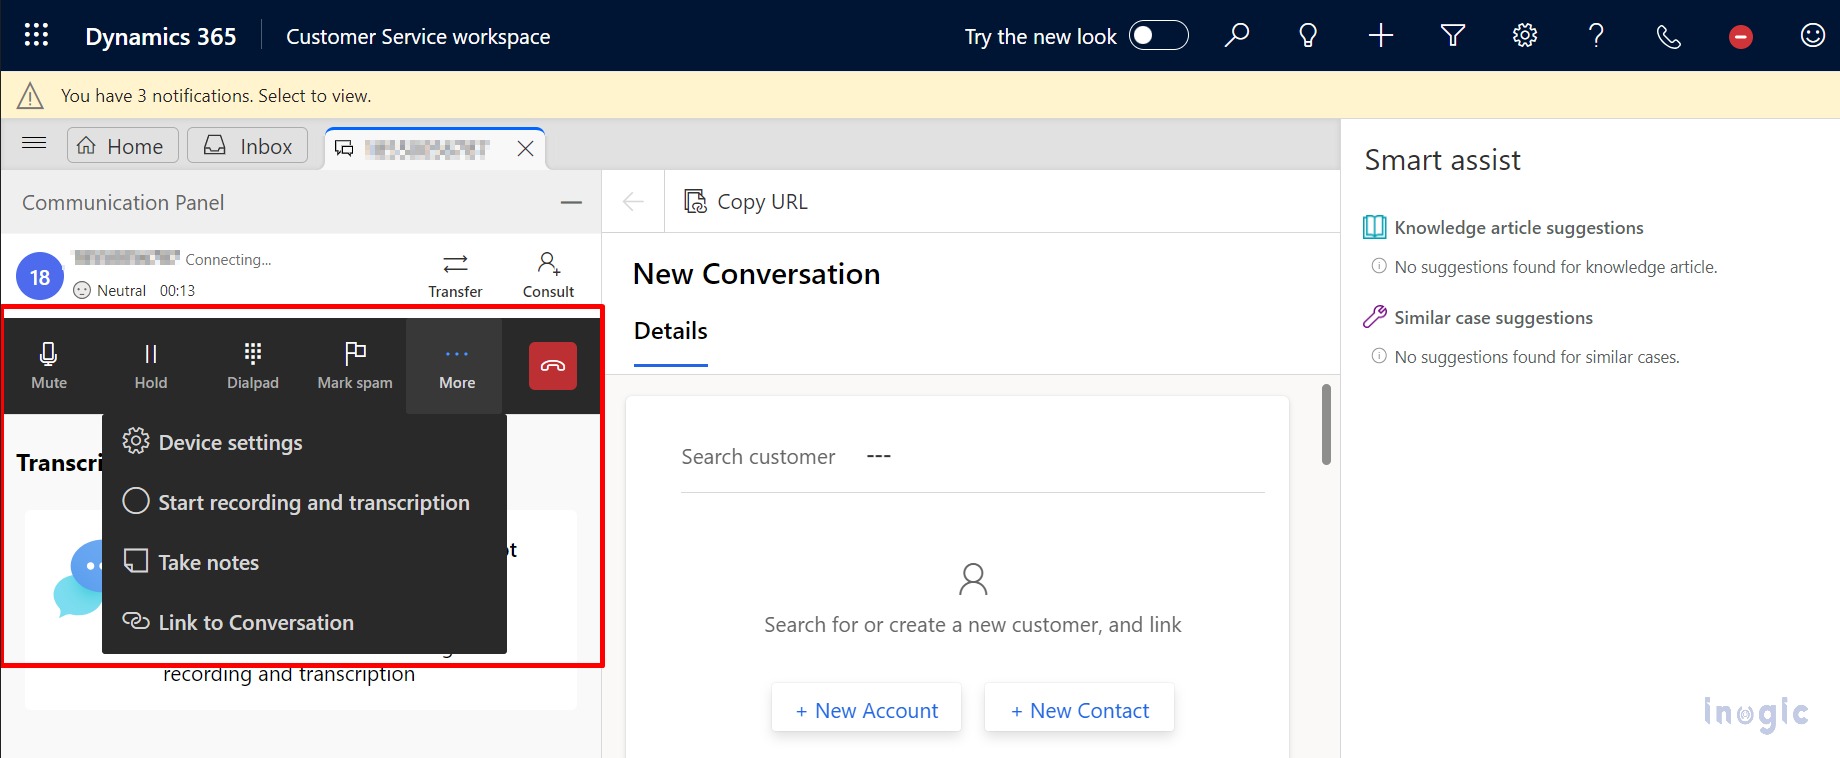
and after click on the More options we get
Device settings
Start recording and transcription
Take Notes
Link to Conversation
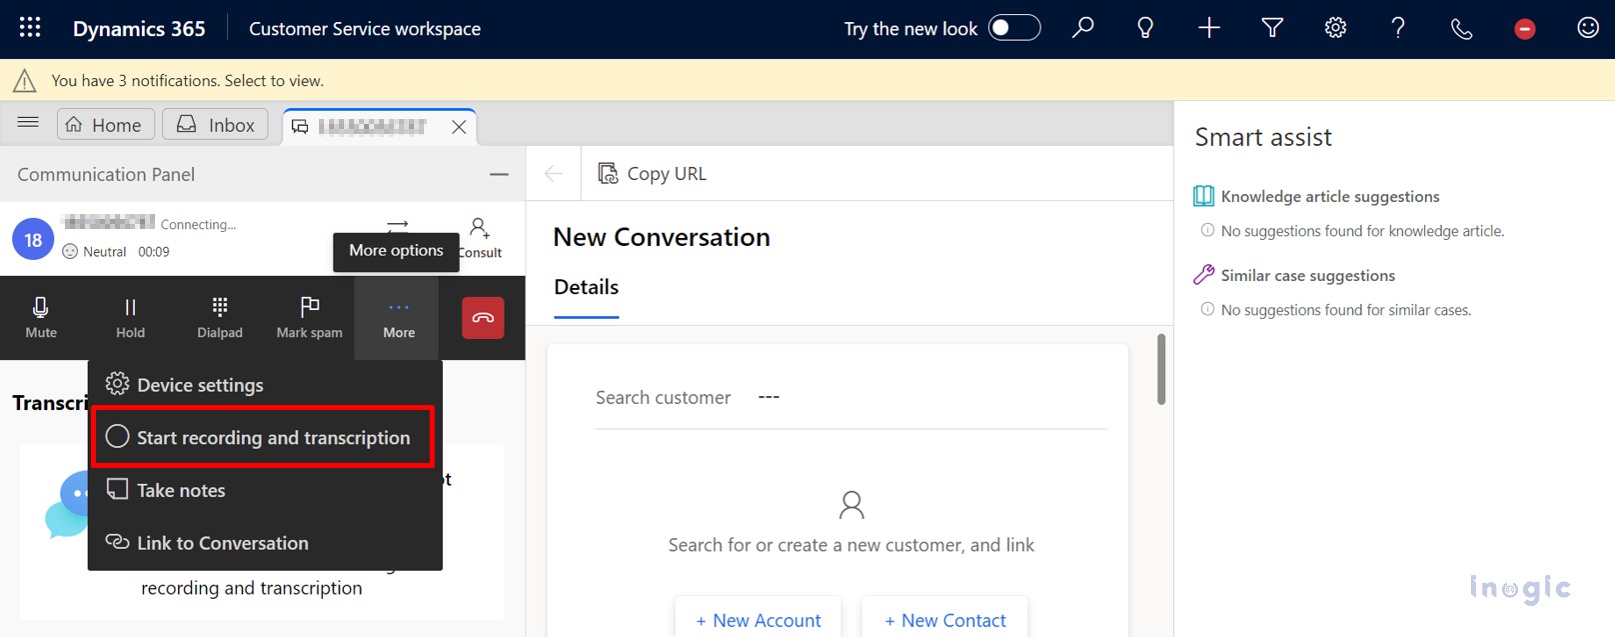
1. When a call is connected initially recording and transcription are not started. We can Start recording and transcription by clicking on radio button in front of Start Recording and Transcription.
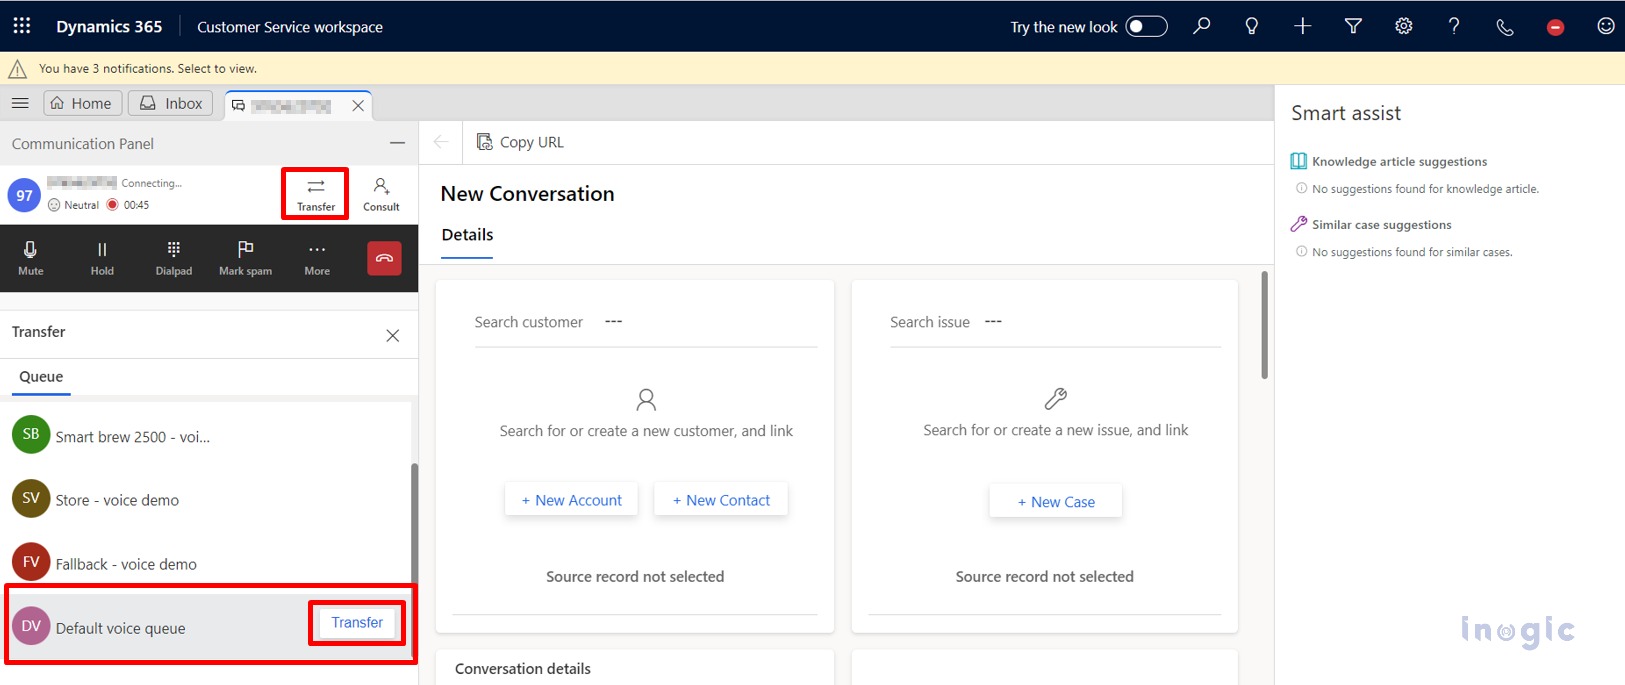
2. For Transferring calls to external members simply click on the ‘Transfer’ button as shown below screenshot then List of queues will open then select a required queue for which you want to transfer a call and click on the Transfer button in front of queue as shown in below screenshot. Queues will ideally consist of members of the call who could potentially be transferred to.
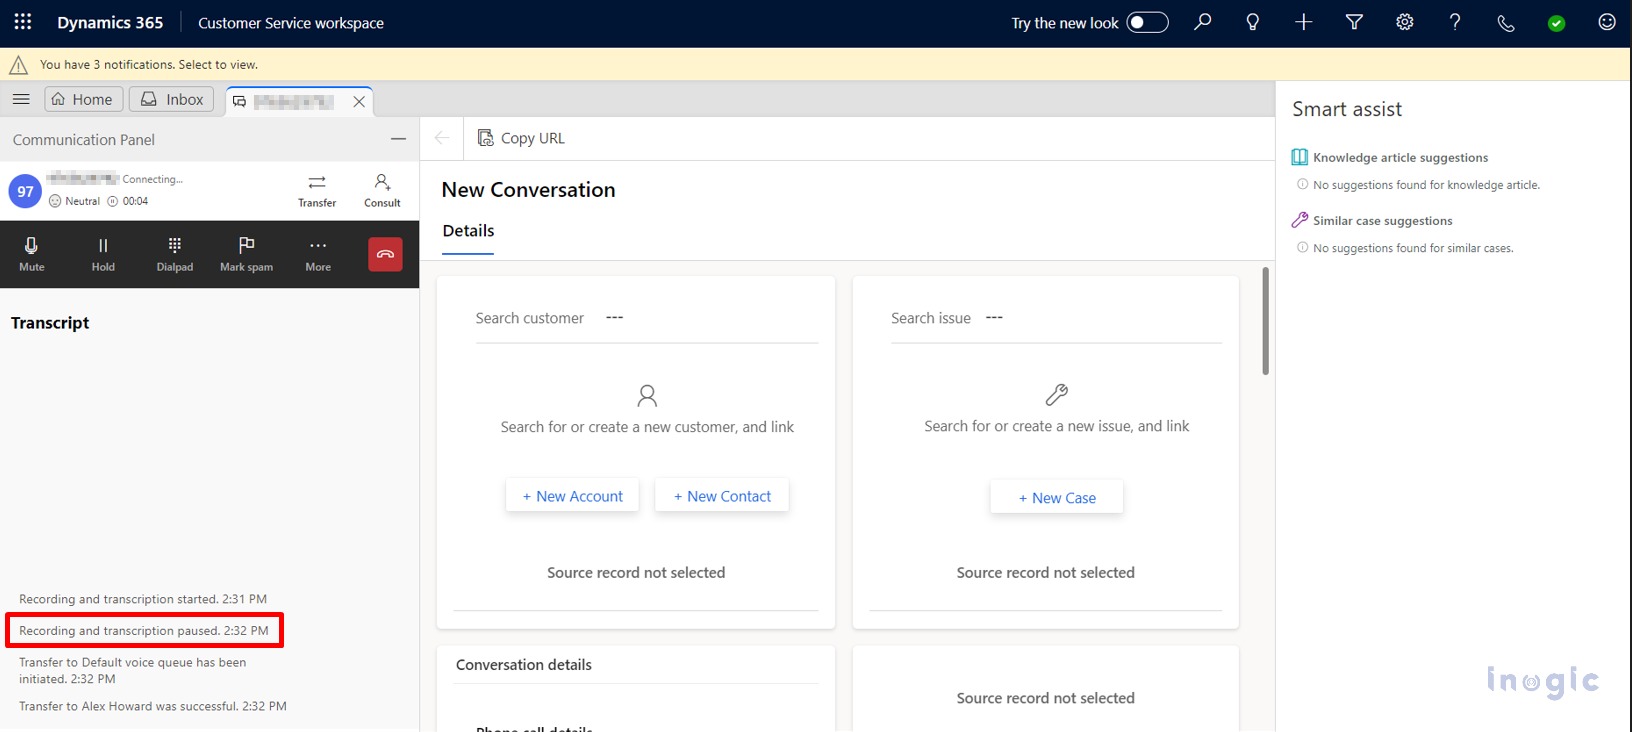
3. When a call is transferred to an external agent then recording and transcription will automatically stop which is shown in the below screenshot.
By following these steps, you can create a secure mechanism for calling external agents from your Customer Service Workspace application, allowing for efficient and safe interactions.
Conclusion
This new enhancement plays an important role in safeguarding of organization’s sensitive information. Any private or sensitive information discussed on the call won’t be recorded or transcribed. It ensures a secure call transfer process.








![Best Practices for Maintaining Government Site Reliability// Woman looking at computer center. [Image: Adobe]](https://www.cybercloudintel.com/wp-content/uploads/2024/12/Best-Practices-for-Maintaining-Government-Site-Reliability-150x150.png)




![Best Practices for Maintaining Government Site Reliability// Woman looking at computer center. [Image: Adobe]](https://www.cybercloudintel.com/wp-content/uploads/2024/12/Best-Practices-for-Maintaining-Government-Site-Reliability-768x432.png)
