Artificial Intelligence (AI) is revolutionizing the tech world, enabling innovative solutions across industries. Microsoft’s Azure OpenAI Service empowers developers by providing access to powerful AI models like Chat-GPT, DALL·E, and Codex, offering endless possibilities for AI-driven applications.
In this blog, you’ll learn how to set up and configure Azure OpenAI Service to unlock its full potential for your projects. Let’s explore the exciting possibilities of Azure OpenAI!
Prerequisites
Before getting started, ensure you have:
Configuration
1. Log in to Azure Portal: Visit the Azure Portal and sign in with your Azure credentials.
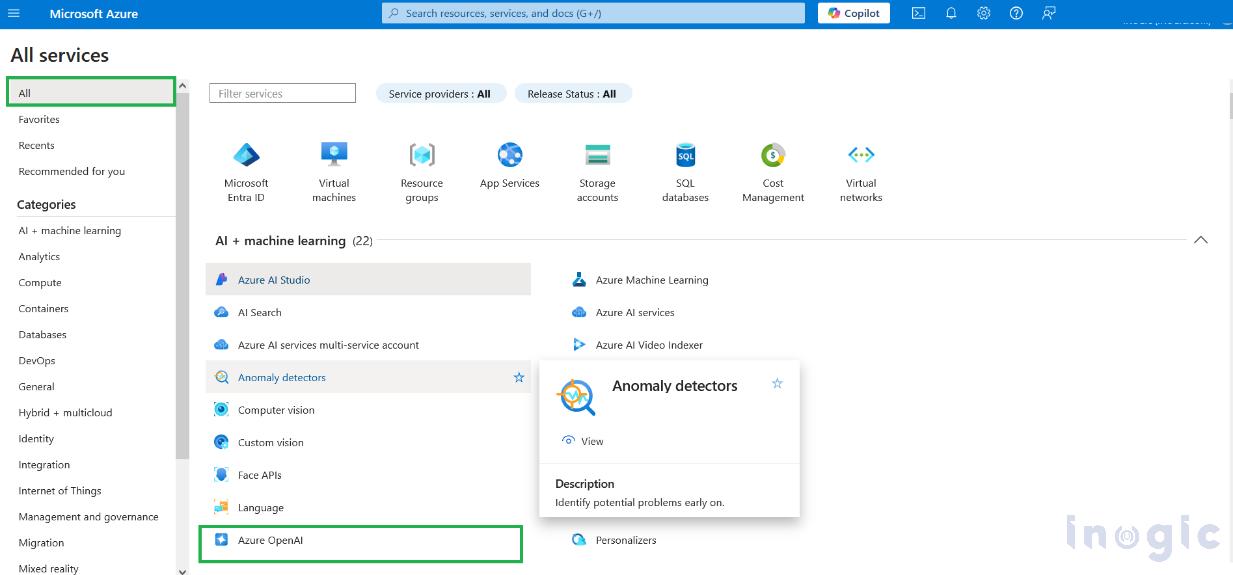
2. Select the Service for Open Ai: Navigate to the Service section and use the “AI + Machine learning Tab” to add the Azure OpenAI, as shown in below image.
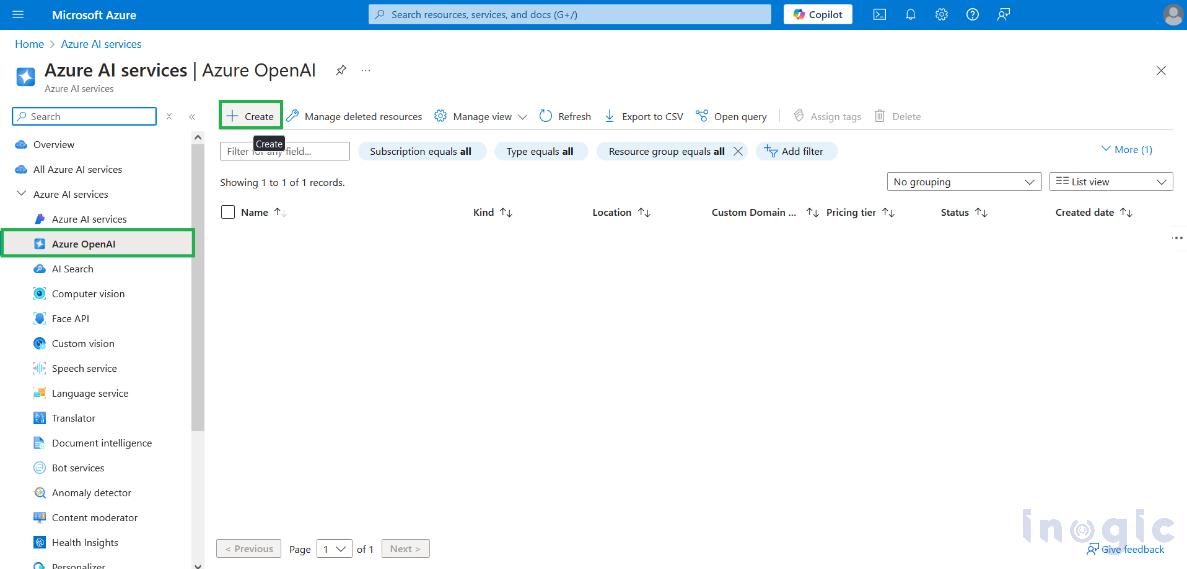
3. Create Open AI Service: After adding the service, you’ll find it on the Azure Portal homepage. Just select Azure OpenAI and create a new OpenAI service right there in your portal.
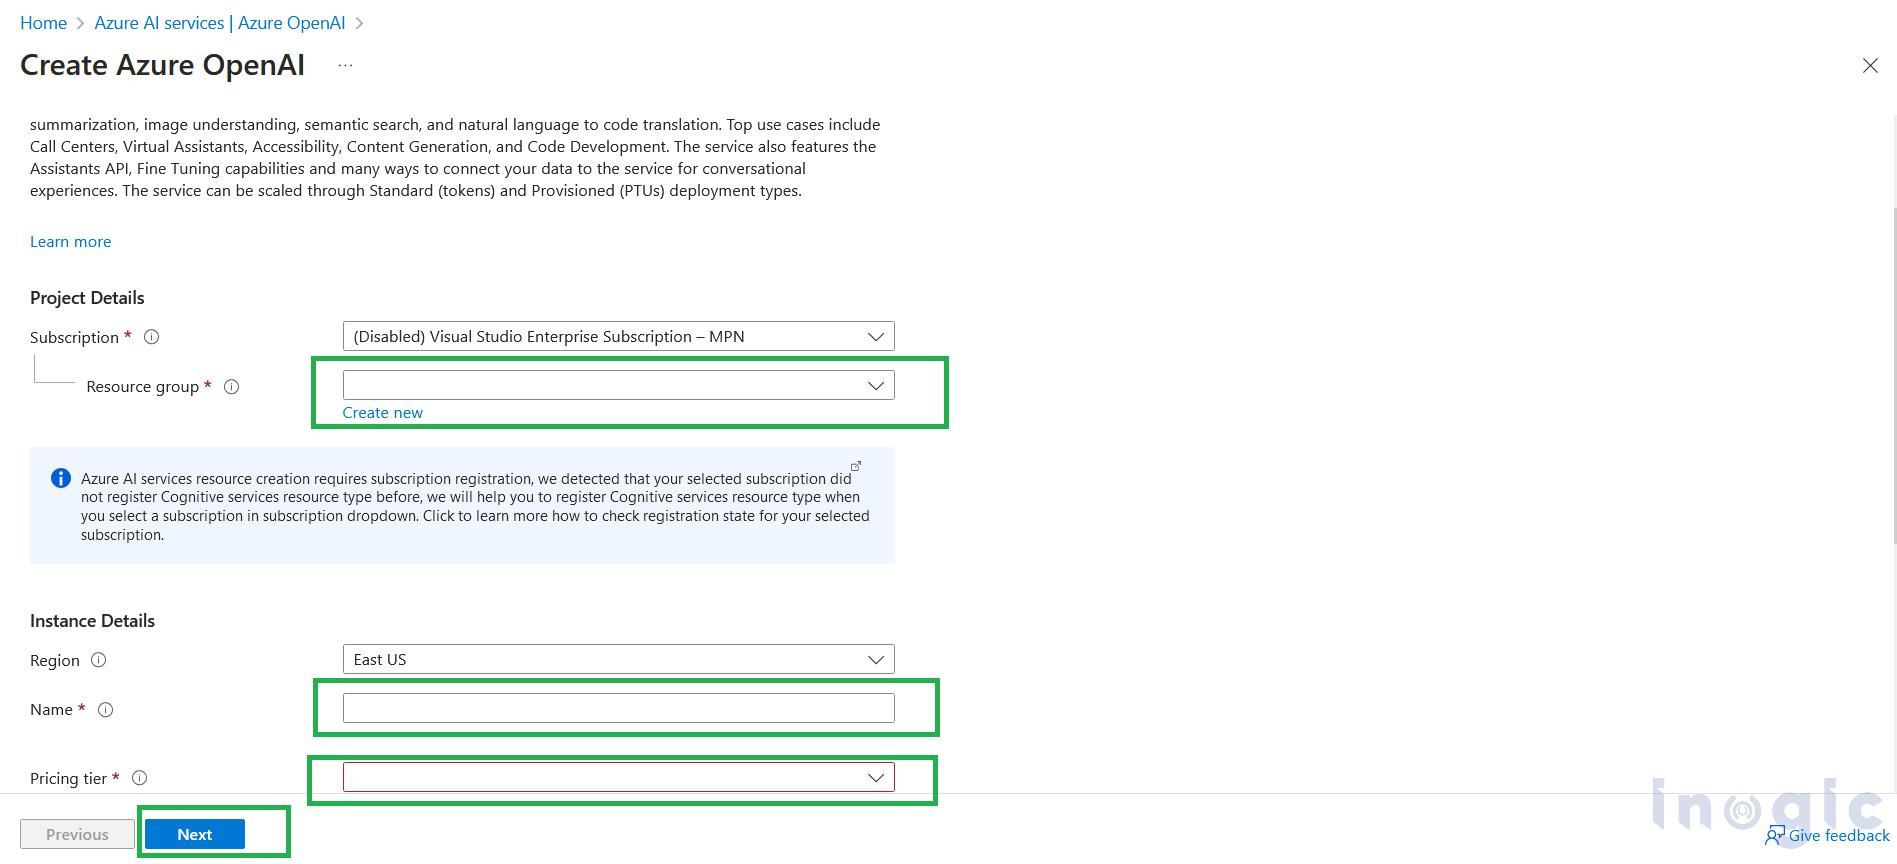
4. While creating the Open AI service you need to fill some basic information to complete the process. As follows
Security Group: Group of people who can access this service
Name: Name of the service you need to give
Pricing tier: Select the appropriate tier based on your region.
After provide all necessary information select next and click on submit and review. It may take few minutes to create the service. As shown in images below.
5. Access the Service:
After successful deployment, navigate to the created Azure OpenAI Service.
Select the Explore and Deploy option from the menu.
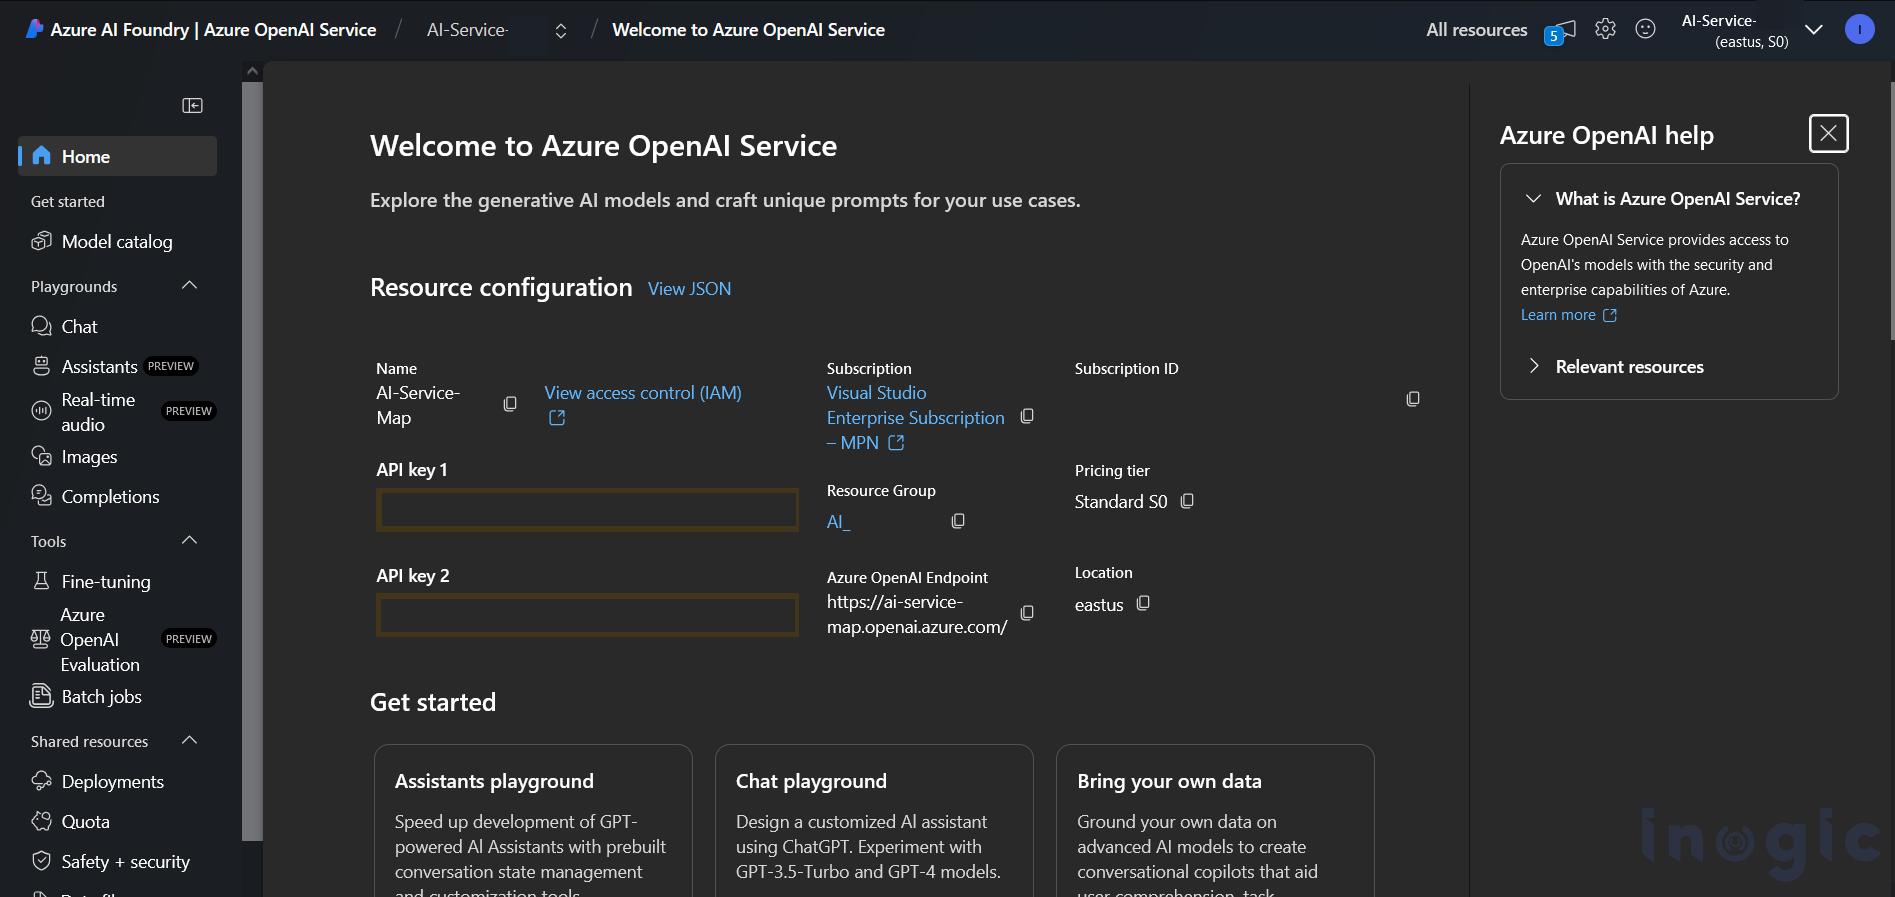
6. Explore Azure AI Foundry:
When you click Explore and Deploy, you’ll be taken to the Azure AI Foundry | Azure OpenAI Service.
Here, you’ll find tools to test and deploy AI models with ease.
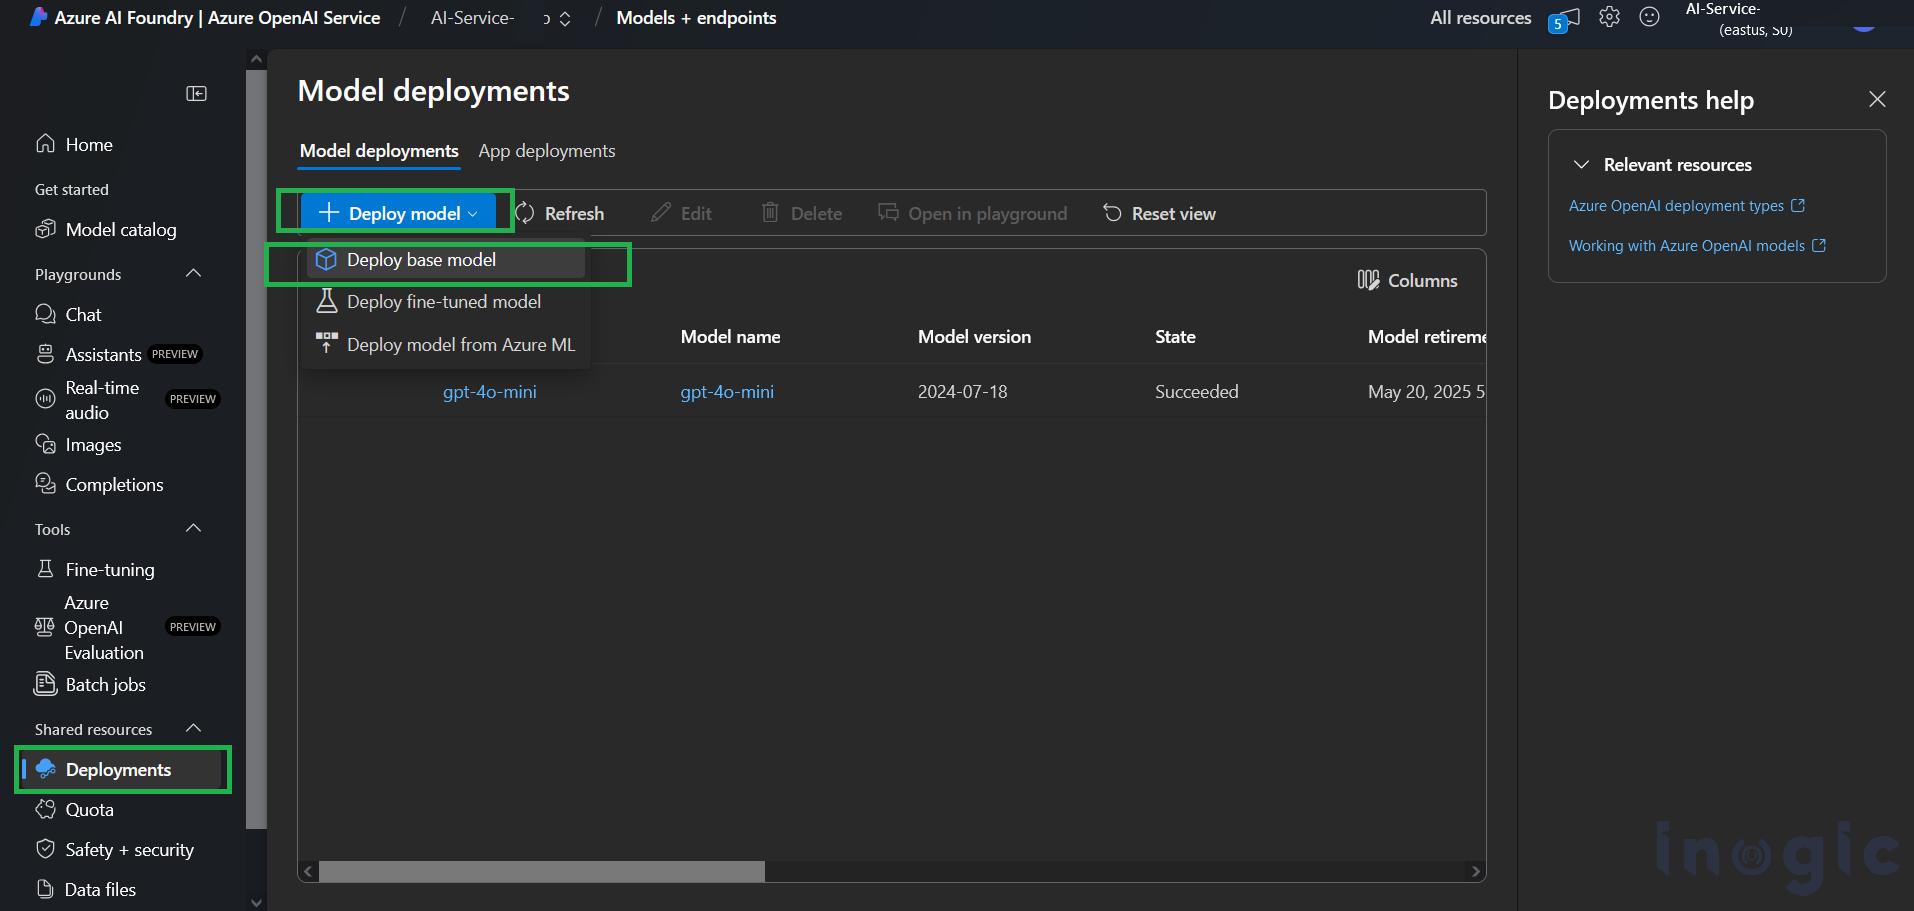
7. Deploy a Model:
In the Azure AI Foundry, locate the Deployments tab from the left-side menu.
Click Deploy Model and select the AI model you’d like to use, such as Chat-GPT, Codex, or DALL·E.
Fill in the deployment details such as deployment name and model type.
Click Create Deployment to deploy the model.
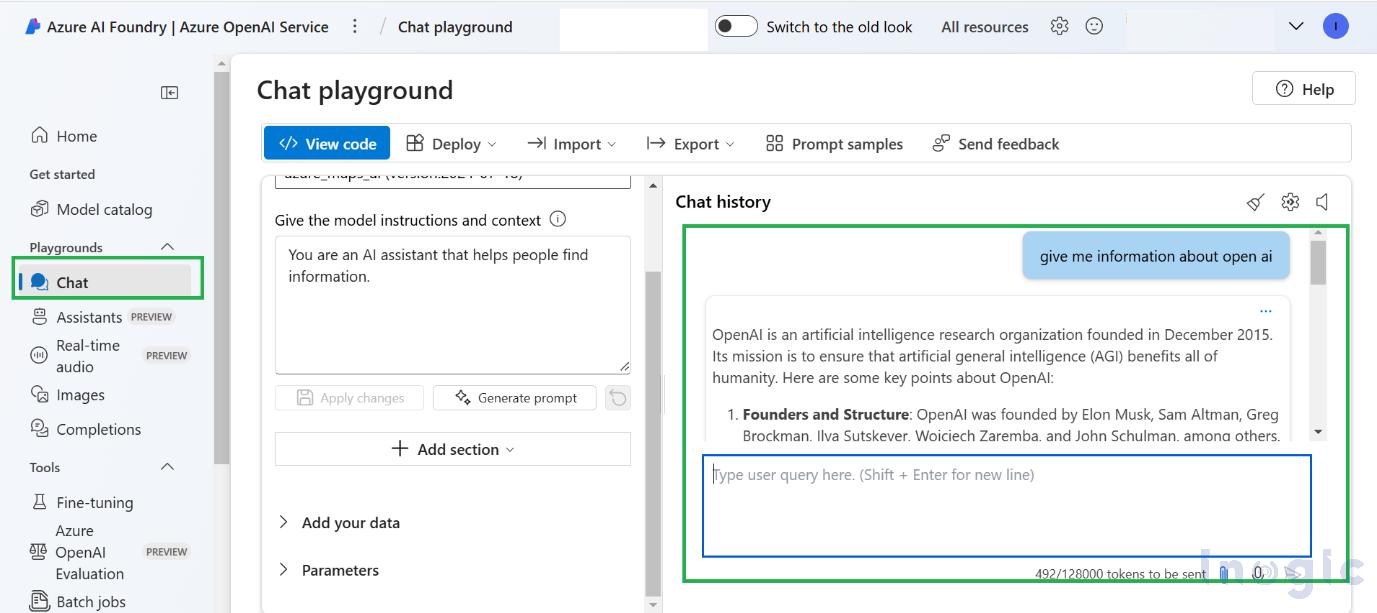
8. Access the Model in Playground:
Once the model is deployed, go to the Playground section from the left-side menu.
Choose the Chat option to interact with your deployed AI model.
Enter prompts and explore how the model responds to different inputs.
Conclusion
With Azure OpenAI Service, you can unlock endless AI-driven opportunities, from creating chatbots and virtual assistants to generating content with ease. This guide will walk you through the simple steps to set up and configure the service effortlessly.
For more information, check out the official Azure OpenAI Documentation.
